Curious how to make awesome tech events in 2024? Join our LinkedIn Webinar TODAY and find out!
Event Technology

Choosing Hardware for Event Registration Desks and Self-Service Check-In Kiosks

Feb 07, 2024 / 5 min read
By: Adis Jugo, CEO
Requirements you place on the check-in process and your budget should should determine which hardware you will opt for regardless of whether you are buying or renting it.
In the first three articles from this blog post series, we have discussed how to organize attended (staffed) check-in queues and how run.events can assist you with that. In the second article, we discussed the circumstances in which self-service check-in kiosks are a viable alternative (or, better yet, a supplement) to traditional atteded check-in. Whatever your decision is in that regard, you will need hardware, whether you buy it or rent it. We will discuss the pros and cons of buying vs. renting hardware in one of the next blog posts of this series, but here and now, let's talk about hardware itself.
 
There are, in essence, four main pieces of hardware that you will need for registration and check-in scenarios:
 
  • Registration and/or kiosk computers (tablets)
  • Badge printers
  • Badge paper and "butterfly" badges
  • Empty badge containers (a.k.a. badge boxes)
  • Kiosk stands (if you opt for kiosks and self-service check-in)
  • Other hardware

Registration Computers (tablets)

 
First things first, and I am fully aware that this might be somewhat controversial: when you are choosing registration and/or kiosk computers, please go for Windows devices. There is a very simple reason for this: Windows is the only operating system that properly supports direct printing (omitting print dialog boxes). Yes, I am fully aware that there are ways and methods to support direct printing on iPads (somewhat less troublesome) and Android (really troublesome) tablets, but that entails a lot of tinkering and potential for errors. In essence, each software tailored for iPads or Android tablets will need to explicitly support printer models (and you know Murphy's Law - the model you need will be missing), whereas Windows computers and tablets are indifferent to printer models; they only care about badge sizes, which makes them much more suitable for badging scenarios.

Luckily, there are many Windows devices out there that can support you in all registration or kiosk scenarios. Microsoft Surface devices are the usual suspects, but there are many "Surface clones" that will work just as well - there are nice alternatives from HP, DELL, and Lenovo.

One important tip from our side is to opt for second-hand, refurbished computers (tablets). You don't need the newest and greatest computers to print badges: a 4-5 year old tablet will suffice. This approach can significantly reduce costs while still providing devices that perform all the necessary tasks.

The second tip is to choose Windows tablets with attachable/detachable keyboards, just like the Microsoft Surface. This way, you can use those tablets both for manned (attended) registration desks (with the keyboard attached) as well as for self-service kiosks (without the keyboard), depending on your needs.

The run.events Kiosk App (which you can easily get from the Microsoft store) will work seamlessly with any Windows computers and tablets that support Windows 10 or newer. The run.events Registration Desk ("Battle Stations") module will support any computer or tablet, regardless of the operating system, as long as the printer is properly configured on that device.

Badge Printers


There is a whole science around badge printers, and the main reason for this is that the vast majority of event organizers and badging companies are actually (mis)using label printers for badging purposes since those printers are much cheaper than specialized badge printers, whose price can easily reach €10,000 or more.
 
We have been discussing printer types and categories in the previous article in this blog post series, but let's summarize them here.
 
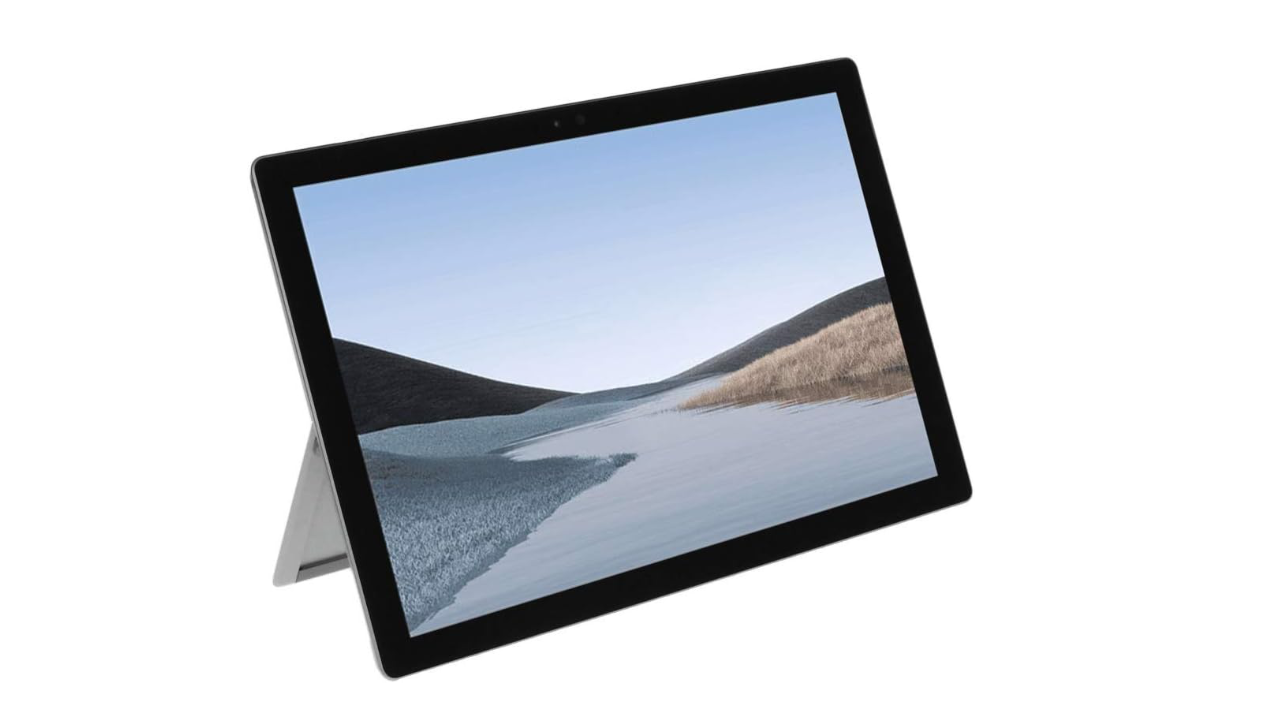
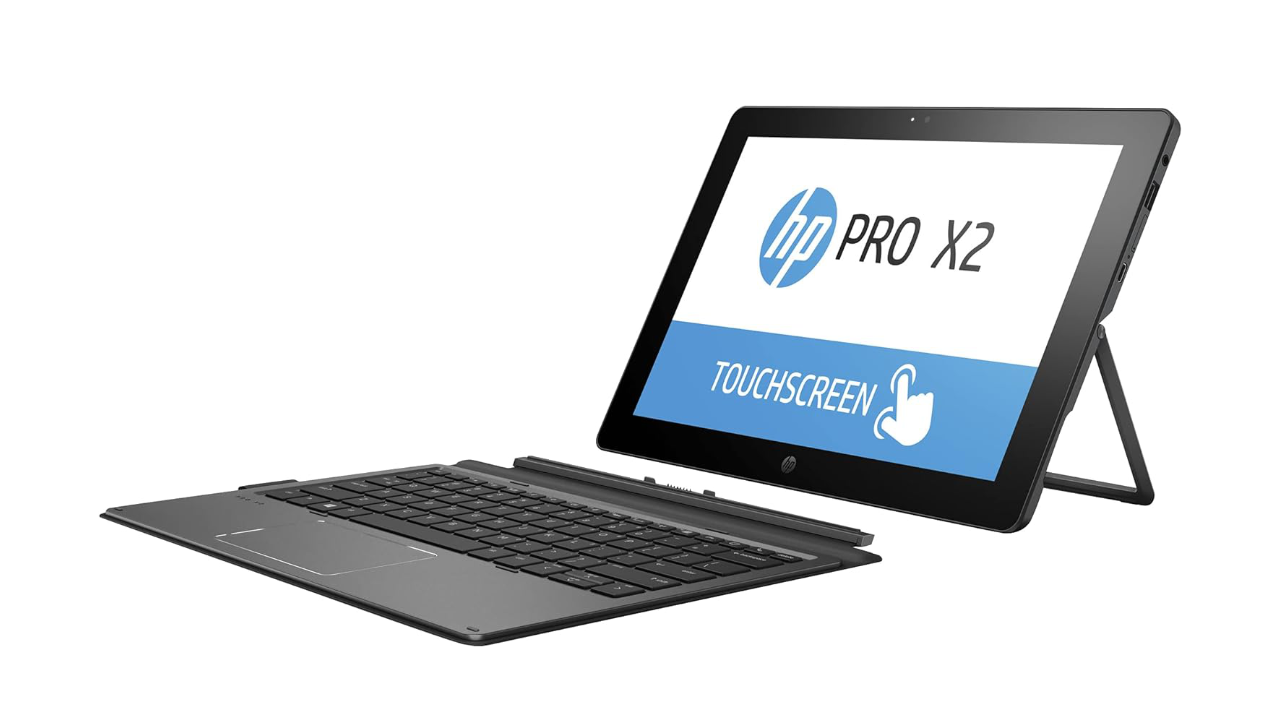
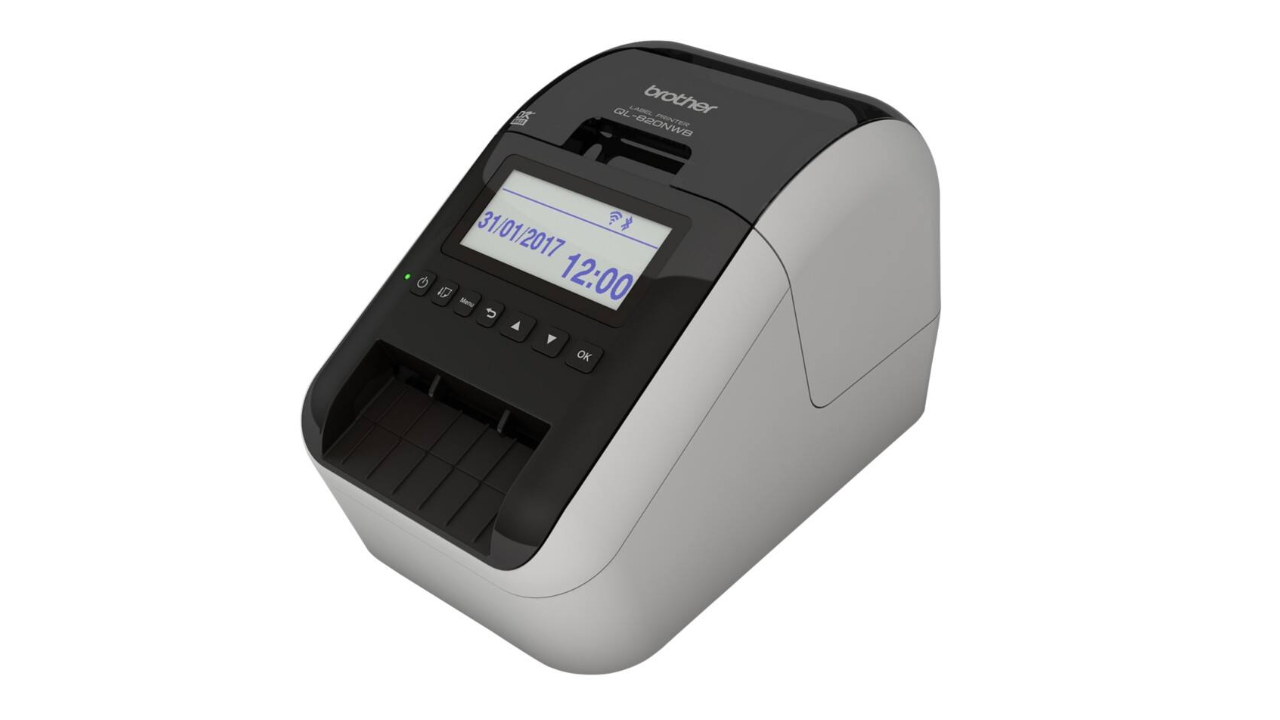
Budget-friendly thermal label printers, such as Dymo, Brother, or cheaper Zebra models
 
These printers and their labels are very affordable, but they involve pre-printing empty badge templates in a professional print shop and affixing labels with attendee data on those templates. This will mostly not be a problem in attended (staffed) registration scenarios, but there might be attendees overwhelmed by that in self-service kiosk scenarios. Even if those printers can only print black text on white labels, the overall badge appearance remains appealing if you make nice, colorful pre-printed badge templates. The price of these printers is usually around 100-200€ each, and the price of labels is negligible. Summa summarum, those printers are really good value for money, and the only two negative points are attendees affixing labels themselves in kiosk scenarios and that you are usually going to pre-print more empty badge templates than you really need, just to be on the safe side, and that will necessarily produce some waste.
 
run.events works with all these models, and here you can find instructions on setting up Brother and Dymo printers to seamlessly work with run.events.
 
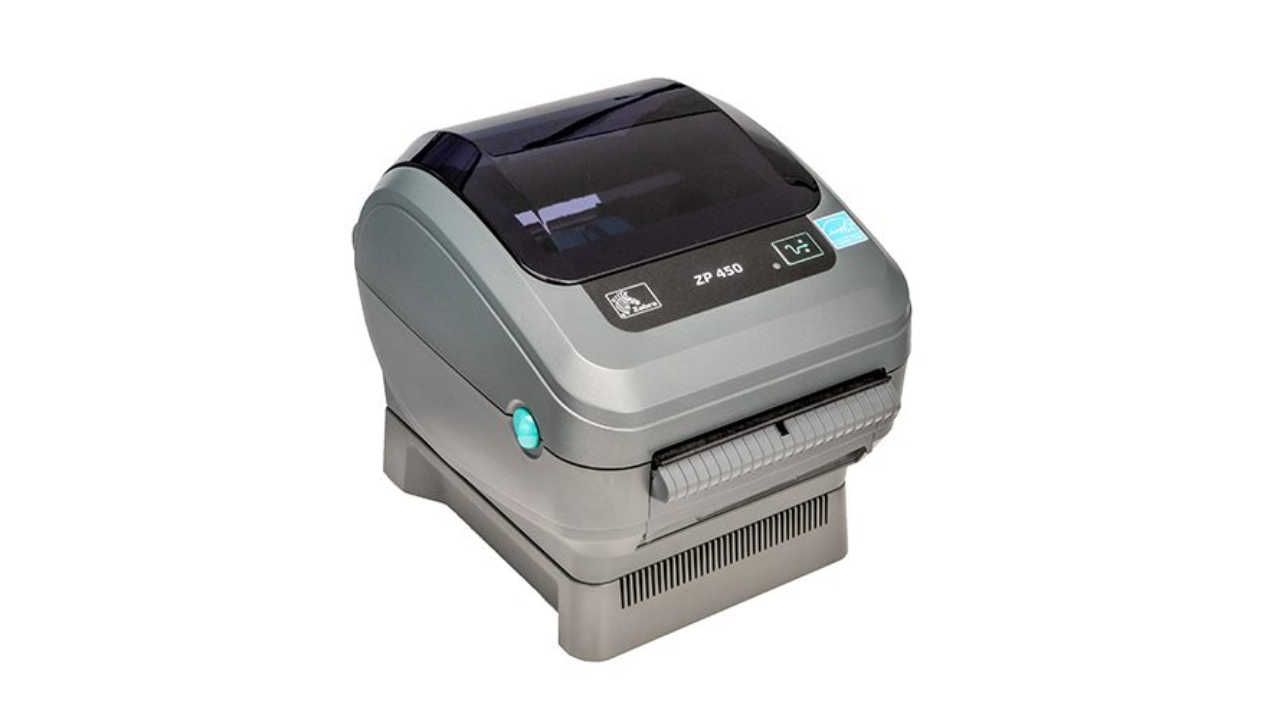
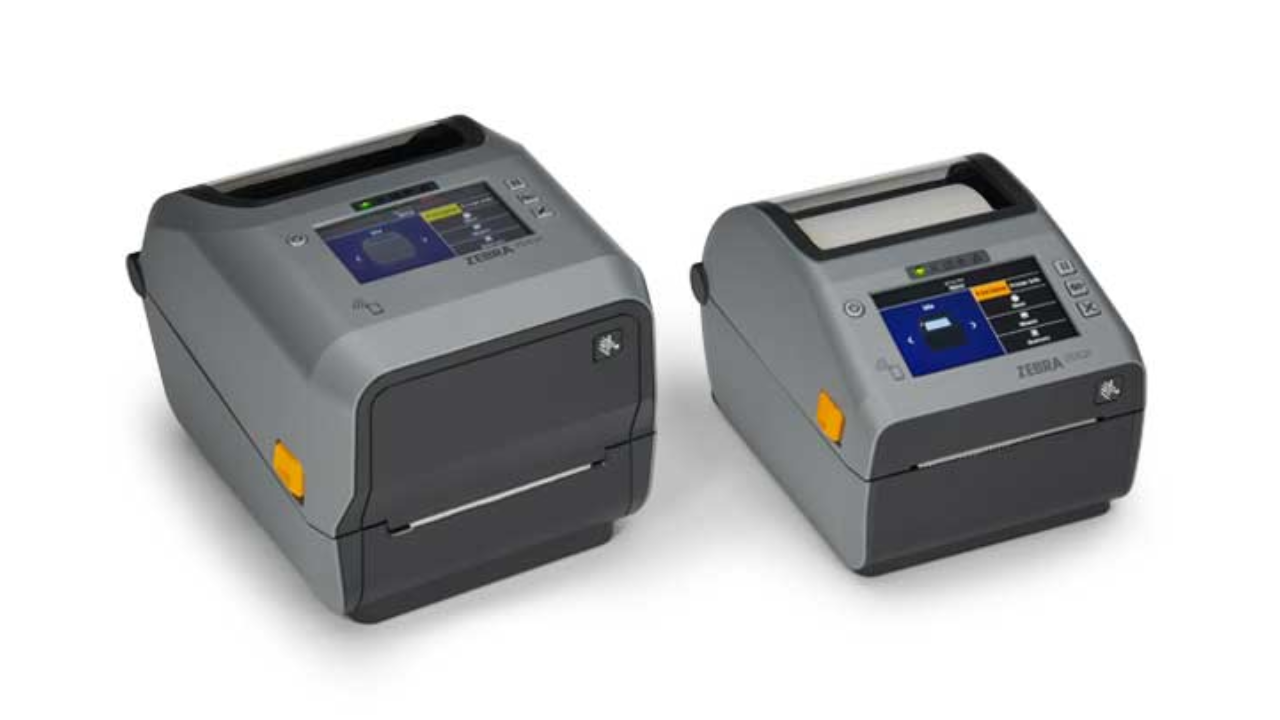
Thermal printers that can print fan-folded/butterfly badges
 
Those printers include somewhat  expensive Zebra models, more precisely Zebra ZD, ZT, and ZP series, which support standard 4" x 3" or 4" x 6" badges. Among these models, Zebra ZD 621 is the most popular one. These printers will print the whole badge at once, and attendees don't have to affix anything; they will merely have to fold the badge together. Since these printers also use thermal printing technology, printed text can only be in black color. However, there are specialized print shops that will pre-print fan-fold paper in your design, so you will print only the attendee data during the check-in process. This is a better-looking and more professional option than budget label printers, but obviously, the costs are also higher. The cost per 1000 badges is usually between 500€ and 1000€ (depends on where you buy the paper, and if it has been pre-printed in your design). Those printers themselves cost between 300€ and 600€ each, depending on the model.
 
Be aware that some Zebra printers don't include cutters as part of the standard equipment, and that you will have to equip them with cutters yourself if you have got such the model. However, not all Zebra printers support cutters, so before ordering your Zebra printers, you need to make sure that they either have built in cutters, or at least that they've got support for it. Cutters are necessary in all kiosk scenarios since you don't want your attendees to tear their fan-fold badges by hand: that would produce too many issues both for them and for you. If your Zebra printer hasn't got a built-in cutter, and if it can be retrofit with one, Zebra's original cutters usually cost around €150 each. 
EPSON CW C3500 and other Ink-jet badge printers that can print fan-folded badges
 
The Epson ColorWorks C3500 is the most prominent example from this category of printers, and probably the most popular event badge printer in the world. Similarly to Zebra ZD621, Epson will print the whole badge at once on fan-fold badge paper, but since Epson CW C3500 uses ink-jet technology, there are a few important differences: it can print color badges, which means that you don't need to pre-print anything. This decreases the paper cost per badge (between 350€ and 500€ per 1000 badges), but you need to add the ink costs on top, which heavily depend on your badge design and color saturation. And, of course, Epson CW C3500 itself costs around 1500€ each.

There are two more things that you need to pay attention to: Epson CW C3500 printers, even if relatively small, are still larger than thermal Zebra ZD621 printers, which makes them more difficult to fit inside self-service kiosks or to place beside registration tablets. Also, they are ink-jet printers, which means that you need to take care of the ink, and possibly be replacing ink cartridges during the registration, which might cause issues and delays. However, these badges definitely give a more professional look and feel to your event.

run.events nicely works seamlessly with Epson CW C3500 printer and fan-fold butterfly badges, and offers a range of beautiful design ideas for the most popular badge prunter in the world.

Premium specialized ink-jet badge printers that can print badges on plastic or high-density paper
 
Swiftcolor SCC-4000D, Canon CX-G6400 Card Printer, and Zebra ZC10L are the most prominent representatives of this category, which you can often see at premium-priced events. This is the most premium option, however, there are a few caveats that come with it. These printers are larger than Epson CW C3500, which makes them almost impossible to fit into regular-size self-service kiosks, and you will probably opt for some kind of desk-style setups. I have seen kiosks that fit Swiftcolor SCC-4000D, but those were large kiosks, indeed. You will need to count on the printing costs of €7 - €20 per badge (depending on which material you opt for, plastic being the most expensive option), and the printer costs themselves are in the price range between 7000€ and 12000€ each. Similarly to the Epson CW C3500, these are ink-jet printers, which means that you will have to keep a close eye on the ink levels during the event.

The nice thing is that run.events flawlessly works with all the above-mentioned printers, and it can support you for whichever check-in flow and hardware set up you opt for.
Epson

By utilizing run.events with the Epson ColorWorks CW 3500 badge printer and Expo Badge fan-fold paper, event organizers can eliminate dependency on external badge printing providers, thereby reducing their costs by thousands of Euros, Dollars, or Pounds.

Lern more

Badge Paper and "Butterfly" Badges

 
You just go and buy badge paper, right? Well, no, it's rather quite the opposite situation, actually. For all four aforementioned printer categories, you will deal very differently with the badge paper.

For the label-sticker budget printers, such as Brother, Dymo, and cheaper Zebra models, you will have no problems. You will buy sticker rolls (they are different for every printer manufacturer), which are very cheap, and this makes the whole badging process on those printers very cost-effective. Yes, you will have to pre-print empty badge templates where those labels will be affix, but that's also more on the affordable side.

It gets way more complex for the thermal printers that can print fan-folded/butterfly badges, such as more expensive Zebra models (e.g., Zebra ZD 621). The badge size you will usually go for with those printers is either 4" x 3" (small expo badges) or 4" x 6" (standard expo badges), and they need to be produced out of material which is suitable for thermal printing. Ideally, you'd also want it pre-printed with your event's design so that you only need to print the attendee data in the designated place. It is fairly easy to get this in the United States. It is difficult enough to get it in the UK. It is really difficult to get it in continental Europe. The cost per 1000 badges is usually between €500 and €1000, depending on where you get it, and if it is pre-printed in your design. If you want your badges to be tear-resistant, you need to calculate an additional 30-50% on top of that price. If you are working with a badging/registration company for your event, they will usually have their preferred supplier, and you won't need to worry about it.

Also, feel free to contact us in run.events, and we will be happy to provide you some contacts where to get those badge templates.

The similar situation is with the fan-fold badges for Epson ColorWorks C3500 printers: getting badge paper is an issue. However, it is somewhat easier and cheaper than with the Zebra ZD 621 printers since that paper doesn't need to be pre-printed for ink-jet printers. The cost will be between 350€ and 500€ per 1000 badges, depending on where you buy the paper. If you want it to be tear-resistant, you need to calculate an additional 30-50% on top of that price.

The same as with thermal fan-fold badges, if you have issues findng the adequate badge paper, plese get in touch with us, and we will be happy to help.

For premium badge printers, such as Swiftcolor and premium Canon and Zebra printers, you will typically buy the badge stock from the printer manufacturer. This eliminates all the guesswork but also makes the price more "premium": be prepared to pay €7 - €20 per badge, depending on which material you opt for, with plastic being the most expensive option.
2019 05 28 06H59m09

You have questions? Talk to us.

In our team, we have 22 grown-ups, 2 babies, 4 dogs, 2 cats, and 0 bots. We know a whole lot about event management, event planning, event registration, check-in kiosks, and similar topics. And we'll be happy to talk to you!
Contact us

Empty Badge Containers (a.k.a. "Badge Boxes")


If you opt for fan-folded badges, whether you use a Zebra ZD621 or a similar thermal printer, or an Epson CW C3500 or a similar ink-jet printer, you will need to feed your badges into your printer from somewhere. Badge paper typically comes in cardboard boxes that you can place behind the printer from where it is then fed into printer, but this takes up a lot of space. The printer is usually 30cm in length, you need to add at least another 30 cm for the paper box, plus a few centimeters of space between the printer and the box - impossible to fit in any form of self-service kiosk setup.

That's why paper feeders ("Badge boxes"), which can be positioned beneath the printer allowing it to sit atop, are available. These feeders, typically constructed from metal or plastic, serve as storage for fan-folded paper. They feature a slit on one side through which the paper is guided and fed directly into the printer.

Beware: there are companies offering "dedicated" badge boxes for €200 apiece, or renting them for €40 a day. You can find very suitable and good-looking alternatives at your local home depot, or even on Amazon, for a fraction of that price. You just need to look for metal or plastic drawers in the appropriate size, and you will quickly find viable alternatives.
5AI 5747

Subscribe to our newsletter

Kiosk Stands

 
The last, but not least - the kiosk stands. If you opt for self-service check-in, you will need to place your hardware somewhere. Sure, you can put a tablet and a printer on a table, and it will work just fine, but the visual effect is less than spectacular.

On the other end of that spectrum are fancy self-service kiosks, with the tablet screen and printer fully integrated into the body of the kiosk. Essentially, they are glorified cupboards, and you can make the same, or even nicer ones, with any decent carpenter.

However, you typically want to deal with your event, not with carpenters. :) If you search on the internet, you can find a lot of self-service kiosk setups ready to buy. You can usually negotiate the price with the manufacturer, and you can agree with them if they should install Windows, Android, or any other type of computer into the body of the kiosk. The same deal goes with printers; very often, you can get badge printers built into the kiosk body. The price of such kiosks, which already contain a touchscreen, a computer, and a badge printer, will usually be around €1500 each. That's a fair price: it's an entire computer including a badge printer that is already inside.

If you are working with a badging/registration company and you are renting your equipment from them, ask them which kiosks they have got, how much they cost, and request them to send you some photos. That way, you'll get an idea of what you are getting.

If you are purchasing and using your own equipment, you can either opt for ready-made kiosks or have a carpenter friend create custom ones based on the hardware you have and your design preferences. Alternatively, you can choose budget-friendly, stylishly designed tablet/printer stands to place your tablets and badge printers. These setups can be quite attractive, yet they won't look as "integrated" as custom-made kiosks.

There are no right or wrong decisions with kiosk setups: it all really depends on whether you are working with badgers or doing registration on your own. It also depends on your budget, your registration flow, and the hardware that you already have.

Other hardware that you might need


This covers what you (might) need of hardware to have a professionally looking registration and self-service check-in process. There are some decisions to be made in order to select the most suitable hardware for your check-in needs, but we hope that you have got an idea now of what has to be done.

However, there are some smaller pieces of equipment that you might need as well to help you with the check-in process.

Hand-held barcode scanners are one of them. When using run.events, your attendees will have their tickets either in the form of QR codes on their mobile devices or eventually paper-printed. The easiest way for the registration desk staff to find and register them is to just scan that QR code - that is much faster than typing in their names and searching for them. Hand-held barcode scanners basically behave as an additional keyboard, so when they scan the code, that code will immediately be searched and processed by run.events Registration Desk.
 
This way, attendee registration and badge printing happens within seconds.
 
Recap
Navigating the landscape of event registration and check-in hardware can seem difficult, but with a clear understanding of your needs and the options available, it can be a streamlined and cost-effective process. Whether you opt for attended registration desks or self-service kiosks, the key lies in selecting the right combination of hardware - tablets, printers, and stands - that aligns with your event's size, audience, and budget. By carefully considering the pros and cons of different hardware choices, from the reliability of Windows tablets to the print quality and cost of various badge printers, you can create a registration setup that not only makes attendee experience a good one, but also reflects the professionalism and branding of your event. The goal is to provide a smooth and efficient check-in process, setting a positive tone for the event right from the start.